Dubai Chocolate Instagram: How to Photograph Your Creations
Master chocolate photography for Instagram with tips on lighting, styling, props, hashtags, and camera angles that make your Dubai chocolate creations look irresistible.
Recipe
# Dubai Chocolate Instagram: How to Photograph Your Creations
*This post may contain affiliate links. If you purchase through these links, we may earn a small commission at no extra cost to you. See our [full disclosure](/disclosure) for details.*
You spent two hours making the most beautiful Dubai chocolate bars, the pistachio cream is swirled perfectly, the kunafa crunch is golden, and then you take a photo and it looks like a sad brown rectangle on a kitchen counter. We have all been there.
The gap between how food looks in person and how it looks on camera is enormous — and it has nothing to do with expensive equipment. Professional food photographers will tell you that 90% of a great food photo comes from lighting and styling, not the camera. Your iPhone is more than capable of taking scroll-stopping chocolate photos if you know the fundamentals.
## The Single Most Important Thing: Lighting
If you learn nothing else from this article, learn this: **natural side light is everything.**
### The Setup
1. Find a window that gets indirect sunlight (north-facing is ideal, or any window on an overcast day)
2. Place a table or cutting board next to the window
3. Position your chocolate so the light comes from the side (not from behind you, not from above)
4. Place a white poster board or large sheet of paper on the opposite side of the food from the window — this bounces light back and fills in shadows
That is it. This simple setup produces professional-quality light that makes chocolate look glossy, rich, and three-dimensional.
### Lighting Mistakes to Avoid
- **Overhead kitchen lights** — Create flat, yellow-toned images with harsh shadows
- **Camera flash** — Makes chocolate look greasy and washes out color
- **Direct sunlight** — Creates blown-out highlights and too-dark shadows
- **Backlighting** — Can work for drinks but makes solid chocolate look like a silhouette
### Time of Day Matters
- **Best:** 9-11 AM and 2-4 PM (soft, angled sunlight)
- **Good:** Overcast days at any time (nature's softbox)
- **Avoid:** Midday sun (too harsh) and after sunset (artificial light is tricky)
## Camera Angles for Chocolate
Different chocolate formats look best from different angles. Here is your cheat sheet:
### 45-Degree Angle (The Most Versatile)
**Best for:** Chocolate bars, truffles, plated desserts, gift boxes
Hold your phone at roughly 45 degrees — halfway between straight-on and overhead. This angle shows both the top surface and the front of the chocolate, giving dimension and depth. It is the most natural viewing angle and works for almost everything.
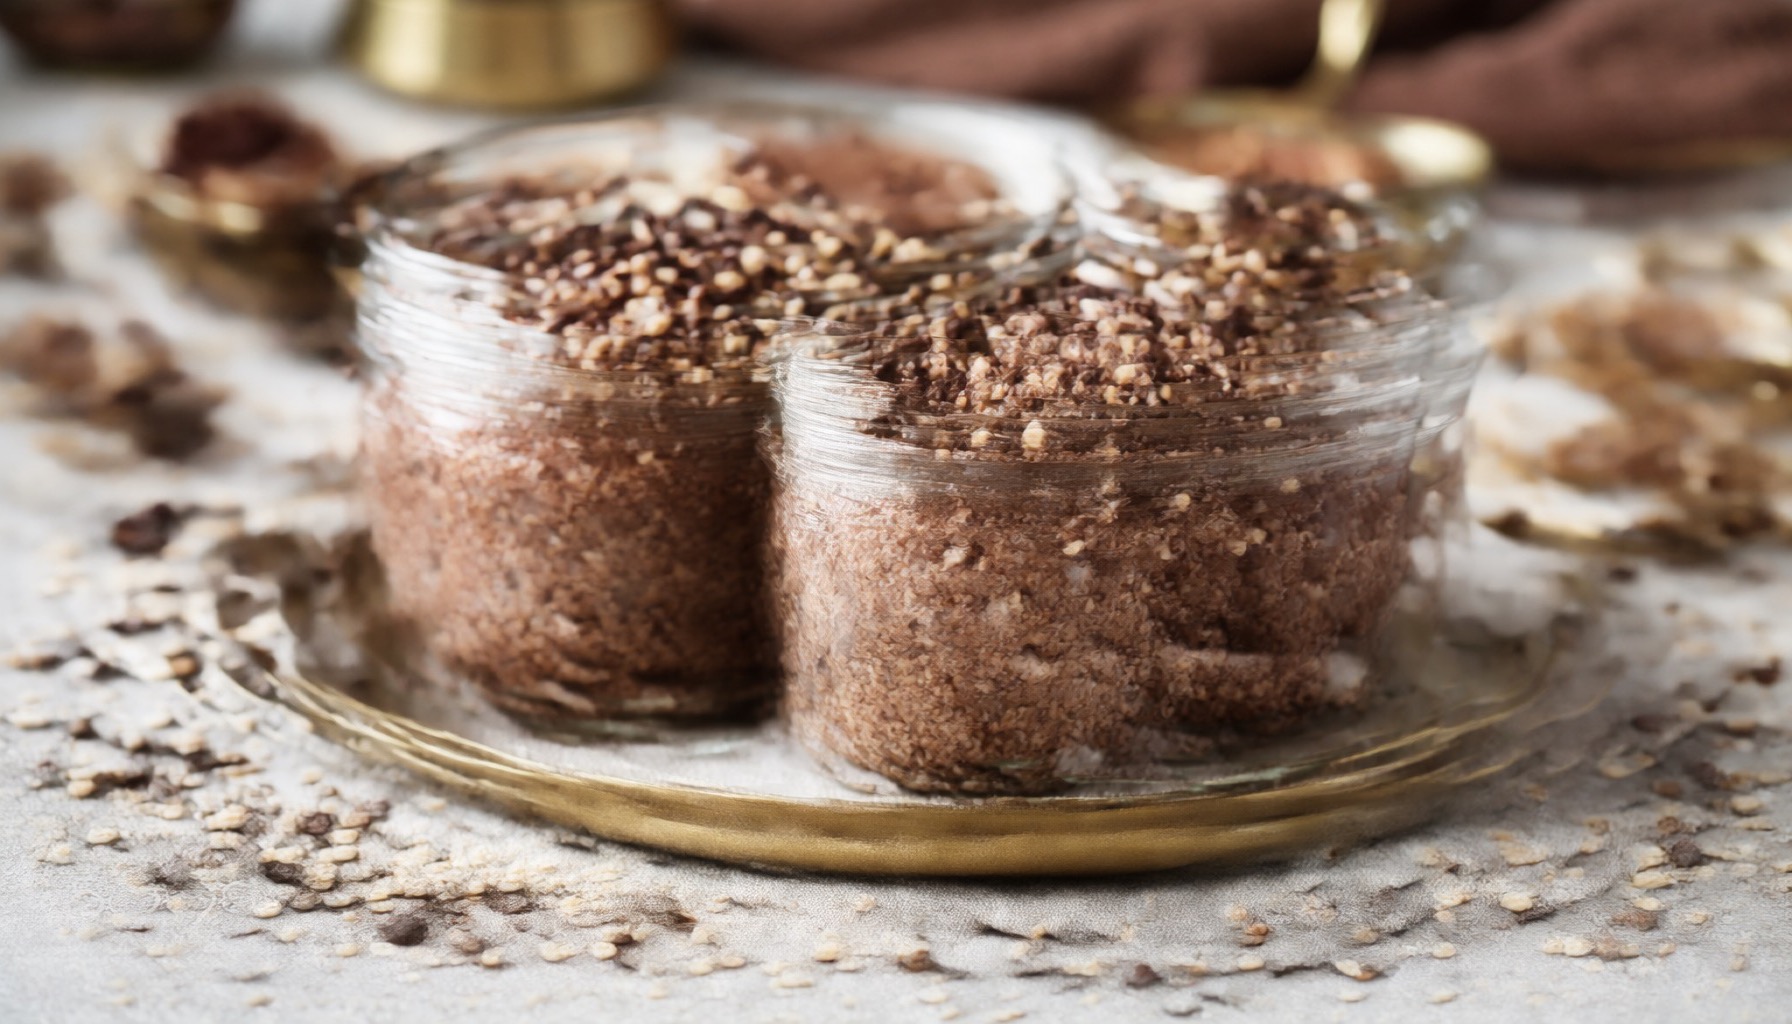
### Flat Lay (Overhead / 90 Degrees)
**Best for:** Spread layouts, chocolate bark, ingredient flatlays, cookie arrangements
Position your phone directly above the food, parallel to the surface. This works beautifully for arrangements like our [Dubai Chocolate Party Menu](/blog/dubai-chocolate-party-menu-feed-20-guests-under-100) spread or an [Advent Calendar](/blog/dubai-chocolate-advent-calendar-24-days-of-recipes) grid of 24 items.
**Flat lay tips:**
- Keep everything on the same plane (no tall items that look distorted)
- Use a clean, textured background (wood, marble, linen)
- Fill the frame — empty space in flat lays looks unintentional
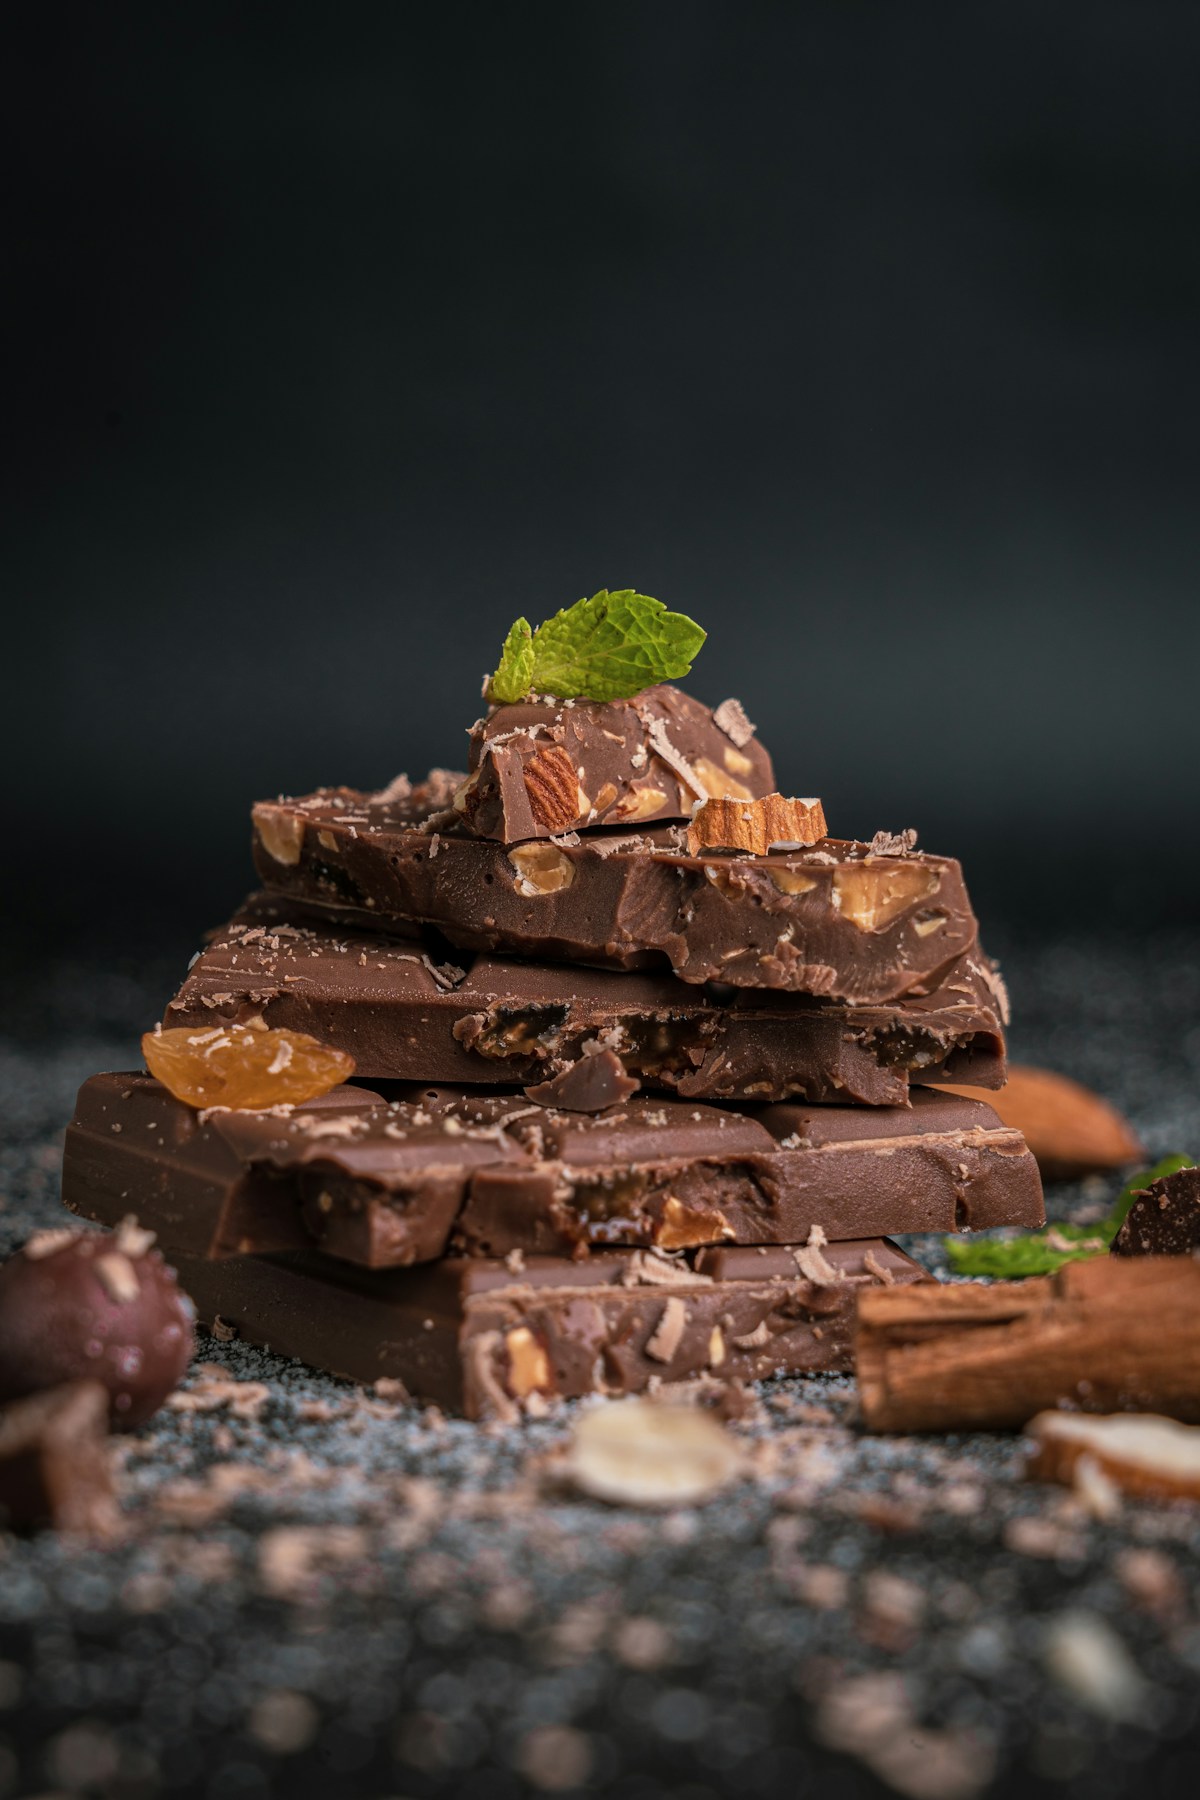
### Straight-On (0 Degrees)
**Best for:** Layered desserts, stacked items, drinks, cross-sections
Get down to the food's level and shoot straight across. This angle is magical for showing layers — a cross-section of a [Dubai chocolate bar](/recipes/classic-dubai-chocolate-bar) with visible kunafa, pistachio cream, and chocolate layers looks incredible from this angle.
### The "Hero Shot" (Slight Low Angle)
**Best for:** Making chocolate look dramatic, heroic, and larger than life
Shoot from slightly below the food's level, angling up just a few degrees. This makes a single chocolate bar or truffle look monumental. Use this for your main product shots.
## Styling and Props
The chocolate is the star, but the supporting cast matters. Here is how to style a scene without it looking cluttered or try-hard.
### Background Options (Ranked)
| Background | Look | Cost | Where to Get It |
|-----------|------|------|-----------------|
| Marble slab/contact paper | Elegant, luxury | $10-15 | Amazon or Home Depot |
| Dark wood cutting board | Warm, artisanal | $15-25 | Any kitchen store |
| Crumpled parchment paper | Rustic, bakery feel | $3 | Your kitchen |
| Linen napkin | Soft, inviting | $5-10 | Target, IKEA |
| Slate cheese board | Dramatic, dark | $10-15 | HomeGoods, TJ Maxx |
| Black poster board | Clean, modern | $2 | Dollar store |
**Avoid:** Busy patterns, shiny surfaces, paper plates, cluttered countertops.
### Props That Work
**The essentials:**
- A few scattered pistachios (in and out of shells)
- A small bowl of cocoa powder or pistachio crumbs
- A knife or offset spatula (suggests the chocolate was just made)
- A piece of parchment paper (bakery vibes)
**Leveling up:**
- Vintage spoons or forks
- A cup of coffee or espresso
- Fresh herbs (mint leaves near chocolate work well)
- A small ceramic bowl with salt flakes
- Dried rose petals or edible flowers
**Too much:**
- More than 5-6 props competing for attention
- Anything that does not relate to the food story
- Plastic or disposable items (they cheapen the image)
- Your hands in every shot (one or two is fine, not every photo)
### The Rule of Odds
Arrange items in odd numbers: 3 truffles, 5 chocolate pieces, 1 main subject with 2 supporting props. Odd numbers feel more natural and visually pleasing than even arrangements.
## Composition Techniques
### Rule of Thirds
Turn on the grid lines on your phone camera. Place your main subject at one of the four intersections where the lines cross — not dead center. This creates a more dynamic, professional composition.
### Leading Lines
Use the edge of a cutting board, a drizzle of chocolate, or a line of pistachio crumbs to lead the viewer's eye toward the main subject.
### Negative Space
Leave intentional empty space in your frame. A single truffle on a clean marble surface with lots of empty space around it communicates luxury and intentionality far more than a cramped, busy shot.
### Depth of Field
On modern iPhones, use Portrait mode to blur the background slightly. This draws attention to the chocolate and makes the image feel more professional. For a more natural look, use the standard camera but get close to the subject — the background will blur naturally.
## Editing: Less Is More
### Recommended Apps
- **Lightroom Mobile (free)** — The best all-around editing app. Use the selective editing tools.
- **Snapseed (free)** — Google's photo editor. The "Selective" and "Details" tools are excellent.
- **VSCO (free with premium)** — Great presets that work well for food. Try A6 or M5.
### Editing Steps (In Order)
1. **Crop** — Remove distracting elements at the edges
2. **Straighten** — Make sure horizontal lines are level
3. **Exposure** — Brighten slightly if needed (chocolate tends to underexpose)
4. **White balance** — Warm slightly if your chocolate looks too cool/blue
5. **Contrast** — Increase slightly to make the chocolate look richer
6. **Shadows** — Lift shadows slightly to show detail in dark areas
7. **Saturation** — Increase by 5-10% max. Chocolate should look rich, not neon.
8. **Sharpening** — A tiny amount (10-15%) to enhance texture
### Editing Mistakes
- **Over-saturating** — Makes chocolate look artificially orange
- **Too much contrast** — Loses detail in highlights and shadows
- **Heavy filters** — Those Instagram filters from 2016 date your photos instantly
- **Over-sharpening** — Creates a harsh, crunchy look
- **Skin smoothing tools on food** — Please do not
## Hashtag Strategy
Hashtags still matter on Instagram for discovery. Use a mix of sizes:
### High-Volume (Discovery)
`#DubaiChocolate` `#ChocolateLovers` `#Foodie` `#HomemadeChocolate` `#ChocolateAddict` `#DessertPorn`
### Medium-Volume (Targeted)
`#DubaiChocolateBar` `#PistachioChocolate` `#KunafaChocolate` `#ChocolateMaking` `#ArtisanChocolate` `#ChocolatePhotography`
### Niche (Engaged Community)
`#DubaiChocolateRecipe` `#HomemadeKunafa` `#ChocolateFromScratch` `#SmallBatchChocolate` `#MiddleEasternDesserts`
### Location-Based
`#[YourCity]Food` `#[YourCity]Foodie` `#[YourCity]Baker`
**Use 15-20 hashtags per post.** Place them in the first comment rather than the caption for a cleaner look.
## Content Ideas That Perform Well
Based on what we see performing best in the Dubai chocolate space:
### Reels/Video
1. **Cross-section cut** — Slicing through a Dubai chocolate bar in slow motion (always goes viral)
2. **Assembly process** — Time-lapse of building a [gift box](/blog/dubai-chocolate-gift-box-at-home)
3. **ASMR crunch** — Close-up audio of biting through kunafa layers
4. **Ingredient spread** — Overhead shot of all ingredients, then the finished product
5. **Taste reaction** — Film someone trying your chocolate for the first time
### Static Posts
1. **Single hero shot** — One beautifully styled piece of chocolate
2. **Flat lay grid** — Multiple varieties arranged in a pattern
3. **Before/after** — Raw ingredients → finished chocolate
4. **Cross-section close-up** — Show those layers
5. **Gift-ready presentation** — Boxed and ribboned, ready to give
### Stories
1. **Behind the scenes** — Real-time baking with captions
2. **Polls** — "Which should I make next?" with two options
3. **Quick tips** — One useful trick per story slide
4. **Unboxing** — Open ingredient deliveries or new supplies
## Phone-Specific Tips
### iPhone (14 and later)
- Use the 1x lens for most shots, 0.5x for flat lays
- Tap to focus on the chocolate, then slide up/down to adjust exposure
- Use Portrait mode at f/2.8 for a natural background blur
- Turn on "Photographic Styles" and set to Rich Contrast for food
### Android (Samsung, Pixel)
- Use the main camera lens for sharpest results
- Samsung: Use Food mode for auto-optimized colors
- Pixel: Use the 2x zoom for a flattering perspective on close-ups
- Turn off beauty/face smoothing if it is on by default
### For Both
- Clean your lens before every shoot (fingerprints are the number one cause of hazy photos)
- Use a tripod or prop your phone against something stable
- Set a 3-second timer to avoid camera shake
- Shoot in the highest resolution available
## Level Up: Advanced Techniques
Once you have mastered the basics, try these:
### Drizzle Action Shot
Have someone drizzle chocolate or pistachio cream while you shoot a video/burst of photos. The motion adds energy and the drizzle creates beautiful visual lines.
### Steam and Warmth
For hot chocolate shots, pour freshly heated liquid right before shooting. The steam only lasts 30-60 seconds, so have everything ready. A steamy cup of [Dubai hot chocolate](/recipes/dubai-hot-chocolate) is inherently more appealing than a cold one.
### Crumble and Break
Chocolate looks more appetizing when it is imperfect. Break a bar in half to show the cross-section. Scatter some crumbs. A few pistachio crumbs falling from above adds drama.
### Moody and Dark
Try a dark, moody setup: dark background, single side light, minimal props. This style makes chocolate look incredibly luxurious and works especially well for dark chocolate pieces.
---
*Show us your best Dubai chocolate photos! Tag us on Instagram — we feature our favorites every Friday.*
You Might Also Like


Affiliate Disclosure: Some links in this recipe are affiliate links. If you purchase through these links, we may earn a small commission at no additional cost to you. This helps us continue creating and testing new recipes. All recommendations are based on our genuine experience and testing.